
Unleash the Goodness: The Health Benefits of Sourdough Bread
Have you hopped on the sourdough bread-making train yet? If not, you might want to consider it because this tangy delight isn’t just delicious; it’s also packed with health benefits.
Gut Health – Sourdough Bread
First off, sourdough bread is a superstar when it comes to gut health. Thanks to its fermentation process, it’s easier to digest and can support a happy tummy. The fermentation process involved in making this bread helps break down carbohydrates, which can lead to a slower release of glucose into the bloodstream. Plus, it may help manage blood sugar levels and reduce the risk of heart disease.
Sourdough bread also contains higher levels of vitamins, minerals, and antioxidants compared to other breads, making it a nutritional powerhouse.
If you are like me I somewhat avoid eating a lot of bread due to potential weight gain. However, it makes sense that when you are going to eat bread that it adds health benefits as well. So make eating bread more enjoyable knowing that it is giving you the health benefit of a healthy tummy. See the benefits of gut health to be informed on how this can improve your overall health.
The next time you’re craving a sandwich or piece of toast, remember that you’re not just indulging in flavor – you’re also treating your body to some fantastic health perks.
Beginner Recipe
Sourdough Bread Starter
Making the starter is actually easy; mostly hands off. It is not instant as it is made over a 7 day period. The wild yeast needed to ferment is naturally in the flour.
Supplies
- 3/4 L jar
Ingredients
To create the starter
- 60 g (1/2 cup) whole wheat flour
- 60 g (1/4 cup) water
To feed the starter each day (Day 3-7)
- To feed the starter each day (Day 3-7):
- 60 g (1/2 cup) unbleached all purpose flour or bread flour
- 60 g (1/4 cup) water
Now Let’s Make the Bread
Ingredients
- 150g/ 5.35 oz bubbly, active sourdough starter
- 250g/ 8.80 oz warm water, preferably filtered*
- 25g/ .90 oz olive oil
- 500g/ 17.65 oz bread flour (not all purpose flour)
- 10g/ .4 oz fine sea salt
- fine ground cornmeal, for dusting
Make the Dough
Whisk the starter, water, and olive oil in a large bowl. Add the flour and salt. Squish everything together with your hands until all of the flour is absorbed. The dough will be dry and shaggy. Cover the bowl with plastic wrap, reusable wrap or a clean, very damp kitchen towel. Let rest (autolyse) for 30 minutes or up to 1 hour, if preferred.
Bulk Rise
Now the dough needs to rise.
Cover the bowl with wrap or a very damp kitchen cloth. Let rest in a warm spot to rise. The dough is ready when it no longer looks dense and has doubled in size. This can take anywhere from 3-12 hours depending on the temperature of your ingredients, the potency of your starter and surrounding environment. For example, in the summer rise times can take anywhere between 2-4 hours @ 85º F/ 29º C whereas in the winter, the dough will take about 10-12 hours @ 68º F/
Cut & Shape the Dough
Divide your work surface in half; lightly flour one side (for cutting) and leave the other half clean (for shaping).
Remove the dough from the bowl, and place onto the floured section so that it does not stick. You do not need to ‘punch down’ the dough; it will gently deflate as you fold and shape it.
Cut the dough in half to make 2 loaves, or leave it whole for a single loaf.
To shape, use a bench scraper to move your dough to the non-floured section (if there is any flour present, it will be difficult to shape- brush away any excess). Starting at the top, fold the dough over toward the center. Give it a slight turn, and then fold over the next section of dough. Repeat until you have come full circle.
Then flip the dough over and place it seam side down. Using your hands, gently cup the sides of the dough and rotate it, using quarter turns in a circular motion. You can also pull it towards you to even out the shape. Repeat this process until you are happy with its appearance. *See note below.
Second Rise
Now the dough needs to rise again, but for a shorter period of time.
Coat the bottom of your Dutch oven with cornmeal. Alternatively, use parchment paper to prevent sticking (this is what I do, now). Place the dough inside for a second shorter rise, about 30 minutes to 1 hour and cover with the lid of the pot or a very damp cloth. The dough ready when it is slightly puffy but not double in size.
Preheat your oven to 450º F/ 232º C towards the tail end of the second rise.
Score the Dough
Right before your bread goes into the oven, make a shallow slash about 2-3 inches long (or more) in the center of the dough. Use a bread lame, sharp pairing or a small serrated steak knife. The cut should be about 1/4-inch deep.
Bake the Dough
Place the bread into the oven on the center rack (lid on) and reduce the temperature to 400° F/ 204° C. Bake for 20 minutes. Remove the lid, and continue to bake (uncovered) for an additional 40 minutes or until deep, golden brown. Keep in mind that all ovens are different; you might have to make minimal adjustments to these temperatures.
You can also take the internal temperature of your bread to double check that it is done. For sourdough, it should read about 205-210º F/ 96-98º C.
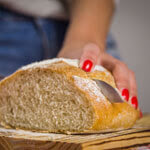
Remove the bread from the oven, and cool on a wire rack for at least an hour before slicing. Don’t cut too soon or else the inside will have a gummy texture!
This Recipe is from The Clever Carrot: Sourdough Bread: A Beginner’s Guide
Now the easy part: Eat the bread and enjoy. Also reap the health benefits from this tasty treat.